
You need a bathroom-specific paint with genuine mildew resistance, not standard interior formula.
Benjamin Moore Aura Bath & Spa or Zinsser Perma-White in satin finish work well—they’re designed to handle steam and condensation without bubbling or peeling.
Use a mold-resistant primer first, then apply two thin coats instead of one heavy coat.
Avoid flat finishes; they absorb moisture excessively.
Pair this with proper ventilation and prep work to prevent the ceiling failure cycle most people encounter.
Why Steam Destroys Ceiling Paint and Labels Mislead
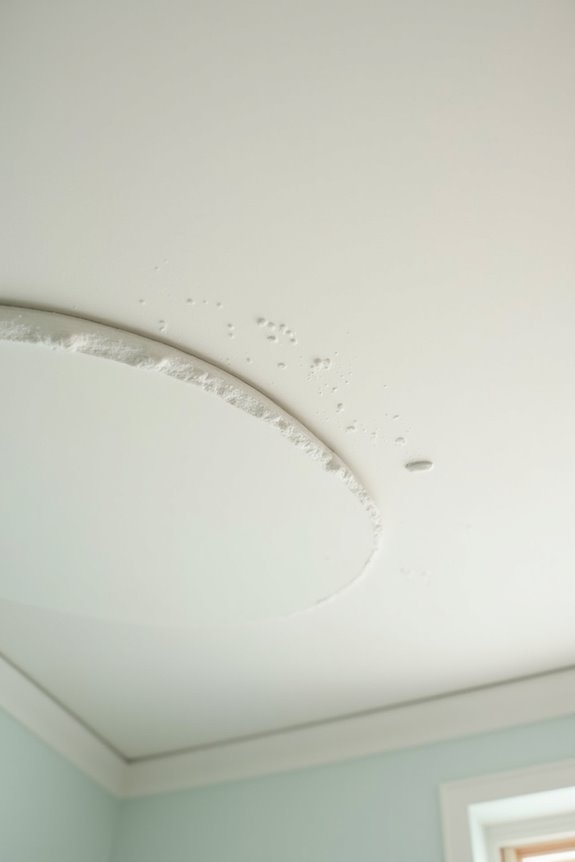
Why does bathroom ceiling paint fail so quickly? Here’s the truth: steam is relentless, and most ceiling paint simply isn’t built to handle it. I’ve watched standard latex formulas bubble and peel within months because they lack real moisture resistance. The problem runs deeper than you’d think. Many “bathroom” paints are just rebranded interior formulas missing genuine mildew resistance and mold growth protection. When steam hits your ceiling, condensation weakens the paint film’s adhesion. As humidity cycles, this causes cracking, bubbling, and peeling. Flat paints are especially vulnerable due to their higher porosity and moisture absorption. Labels can be misleading—don’t assume interior or ceiling-labeled paints work in steamy bathrooms. You need formulas with actual moisture barriers and tested mildew inhibitors to protect your investment.
3 Critical Paint Properties for Humid Bathrooms
When you’re dealing with a bathroom ceiling, three specific paint properties determine your results: mold and mildew resistance, moisture tolerance, and adhesion strength. You’ll want a formula with antimicrobial additives built in—these actually inhibit mold growth on the paint film itself rather than just hoping it won’t show up later. The paint needs to handle steam and humidity without peeling or failing, which means choosing something designed for wet environments instead of grabbing standard interior paint off the shelf.
Mold & Mildew Resistance
The enemy of every bathroom ceiling isn’t just moisture—it’s what grows in that moisture, and you’ll want paint that actually fights back. Mildew resistance isn’t optional in bathrooms; it’s necessary. You’ll find bathroom ceiling paint formulated with anti-mildew additives that prevent spores from colonizing the paint film itself. A quality mold-resistant primer like Zinsser or Benjamin Moore Fresh Start kills existing mold while blocking future growth before you apply your topcoat. Look for moisture barrier paint with built-in antimicrobial properties—these premium options reduce long-term mildew risk significantly. Acrylic latex finishes resist swelling and blistering in high humidity. Combining a mold-resistant primer with proper ventilation and surface prep provides the strongest defense against bathroom ceiling mildew.
Moisture Tolerance & Adhesion
How much moisture can your ceiling paint actually handle before it starts failing you? I’ll tell you: standard interior paint won’t cut it in your bathroom. You need products with genuine moisture tolerance that resist swelling, blistering, and peeling when humidity spikes.
Here’s what I’ve learned: adhesion is everything. Before applying your bathroom ceiling topcoat, I use a mold-resistant primer specifically designed for moisture-prone surfaces. This creates a stable foundation that holds strong against constant condensation.
Water-based latex with moisture-blocking additives balances vapor resistance with easy cleanup—exactly what you need. Layering a dedicated mold-resistant primer under your bathroom-grade topcoat dramatically improves long-term protection and adhesion. Skip this step, and you’re inviting failure.
Best Paints for Steamy Bathroom Ceilings (2025 Edition)
Why do most bathroom ceiling paints fail within a couple years? They can’t handle constant moisture and humidity. That’s where selecting the right products matters.
| Paint Brand | Key Feature | Best For |
|---|---|---|
| Benjamin Moore Aura Bath & Spa | Color Lock technology | Matte finish, glare reduction |
| Zinsser Perma-White | Mildew-proof formula | Self-priming application |
| Sherwin-Williams Duration Home | Antimicrobial protection | Multiple sheens, lasting durability |
| Behr Premium Plus Ultra | Budget-friendly option | Easy ceiling application |
I recommend starting with Aura Bath & Spa for steamy bathroom ceilings. Its moisture resistance and mildew-proof performance keep your ceiling looking fresh longer. The matte finish won’t highlight water stains or imperfections. You’ll appreciate the Color Lock technology that resists moisture while maintaining durability.
Matte vs. Satin vs. Semi-Gloss: Which Finish for Bathroom Ceilings?
I’ve tested all three finishes in my own bathrooms, and here’s what I found: modern matte formulas with bathroom-rated moisture resistance actually outperform what I expected, cutting down glare while resisting mold way better than traditional flat paints, but glossy finishes like satin and semi-gloss fight back with superior washability and durability in steamy conditions—they just reflect light and show every ceiling imperfection you’d rather hide. The real tension comes down to what matters more to you: that clean, shadow-free matte look that hides dust and texture, or the practical durability of a satin finish that’ll let you wipe away moisture buildup without worrying about permanent staining.
Modern Matte Performance Advantages
When you’re staring up at your bathroom ceiling, deciding between matte, satin, and semi-gloss finishes, you’re really choosing between glare reduction and moisture protection. Modern matte paints have improved significantly in handling both factors. Today’s formulations include built-in moisture barriers that prevent swelling and peeling, which older matte options couldn’t manage. You’ll get the glare reduction you want without sacrificing durability. The real advantage? Modern matte performance combines mildew protection with a finish that hides surface imperfections naturally. Unlike semi-gloss, which highlights every bump and creates harsh reflections under bathroom lighting, quality matte bathroom ceiling paint resists moisture damage while keeping your overhead view soft and forgiving.
Glossy Finishes And Drawbacks
How tempting is that semi-gloss shine when you’re standing in the paint aisle? I get it—that reflective sheen promises moisture resistance and easy wiping, exactly what we want in steamy bathrooms. Here’s the catch: glossy finishes highlight every ceiling imperfection, dust particle, and water spot. They’ll also create annoying glare under your bathroom lighting. You’ll see your mistakes magnified. The durability factor sounds great, but that glossiness requires near-perfect ceiling prep. Any bumps, cracks, or uneven texture become glaringly obvious. For most of us tackling ceiling projects, semi-gloss creates more headaches than solutions. Unless your ceiling’s in pristine condition and you’re committed to meticulous preparation, I’d skip the high-sheen approach. Your eyes—and your sanity—will thank you.
Satin: The Balanced Middle Ground
After wrestling with glossy finishes that magnify every imperfection, you’ll find satin offers something genuinely practical: a real compromise between moisture resistance and livability. I’ve discovered that satin finishes resist swelling and staining from humidity far better than matte paints, while avoiding that distracting glare you get from glossier options.
What makes satin work on your bathroom ceiling is its slight shine, which bounces light around and makes cramped spaces feel brighter. You’re also getting washability—soap and water clean these surfaces easily when you need it.
Pair satin with a mold-resistant primer, and you’ve got a durable solution built for steamy environments. You’re not sacrificing performance for comfort anymore; you’re getting both. That’s why satin has become the go-to choice for serious bathroom projects.
Should You Use Primer + Topcoat or Paint & Primer in One?

Why does separating primer and topcoat matter in a bathroom? I’ll tell you—it’s the difference between paint that lasts and paint that fails. When you skip the dedicated primer and grab a paint-primer combo instead, you’re gambling with your bathroom ceiling’s future. Here’s the truth: a mold-resistant primer designed specifically for damp environments creates a moisture barrier that combined products simply can’t match. I recommend using Zinsser Perma-White or Benjamin Moore Fresh Start first, then finishing with a bathroom-rated topcoat. Yes, it takes extra time and effort, but this two-layer approach maximizes durability against steam and mildew. Your bathroom ceiling benefits from the superior protection that a separate primer-topcoat combination provides.
Surface Prep and Application: Why They Determine Success
Got a bathroom ceiling that’s ready for paint? Here’s where success actually happens. I’ve learned that prep work makes or breaks your project. Start by cleaning mildew with a solution, removing any peeling paint, and sanding smooth—this foundation matters. Next, prime with a mold-resistant primer; it blocks stains and improves topcoat adhesion while boosting moisture resistance and mildew control. Then apply two thin coats instead of one heavy coat, which prevents sagging and bubbling. Use a roller for large ceiling texture areas and a brush for corners to achieve even coverage. Maintain ventilation during painting and drying to accelerate moisture evaporation. These steps aren’t shortcuts—they’re the difference between a ceiling that lasts and one that fails in months.
Choose Paint by Bathroom Type: 4 Real Scenarios

How do you know which paint actually works for *your* bathroom? I’ve learned that one approach doesn’t fit everyone. If you’re dealing with a low ceiling above your showerhead, I’d use two coats of mold-resistant primer, then finish with a water-repellent matte topcoat. For rental properties, I choose durable, low-VOC satin or semi-gloss finishes that resist stains. When I’m buying time before a full remodel, spot-priming affected areas with specialized mold-killing primers followed by budget bathroom paint works. In a standard, well-ventilated bathroom, I prioritize bathroom-specific paint with built-in mildew inhibitors. The key across all scenarios: avoid flat finishes on steamy bathroom ceilings. Instead, I select moisture-tolerant finishes—satin, semi-gloss, or matte baths—paired with proper primers for lasting protection.
5 Common Mistakes That Destroy Bathroom Ceiling Paint
Most bathroom ceiling paint failures I’ve seen come down to five preventable mistakes—and honestly, they’re frustrating because they’re so easy to avoid once you know better.
- Skipping mold-killing primer lets moisture penetrate porous surfaces, causing early peeling and mildew growth
- Painting over damp surfaces traps moisture underneath, creating bubbles and accelerated failure
- Using non-mold-resistant paint forfeits built-in antimicrobial protection you actually need
- Ignoring ventilation during and after painting lets humidity wreck your work faster
I learned the hard way that flat ceiling paint absorbs moisture like a sponge, increasing staining and swelling risks. When you skip these steps, you’re inviting mold and mildew to move in. The good news? Getting them right keeps your bathroom ceiling from becoming a maintenance nightmare and helps it last longer.
When to Call a Pro: Questions to Ask First
You can dodge most of those five mistakes on your own—proper prep, the right primer, decent ventilation—but sometimes the job’s bigger than a weekend project, especially if you’re dealing with existing mold, structural damage from moisture, or a ceiling that’s peeling in patches.
When you call a pro, ask directly: Do they work on moisture-prone ceilings regularly? Request their specifics on mold/mildew-resistant primers and moisture-tolerant topcoats. Get a written scope and estimate breaking down labor hours, materials, surface prep, priming, and two topcoat applications.
| Question | Why It Matters |
|---|---|
| Bathroom ventilation plan? | Prevents future failure |
| Separate primer-topcoat strategy? | Better moisture protection |
| Long-term maintenance schedule? | Keeps your ceiling lasting |
You’re investing in durability, not just coverage.